To bring a built-in virtual machine ability’s to Windows 11, Microsoft has been working on its own VM application called Hyper-V. Like other virtual machine applications, Hyper-V allows you to run various operating systems on top of Windows 11. Just recently, we managed to run Windows 11X on Windows 11 PC using Hyper-V.

While that’s fabulous, the problem with Hyper-V is that it’s available on all versions of Windows 11 except for Home. However, there’s a way to install Hyper-V on Windows 11 Home. Follow our steps to find out the steps.
Install Hyper-V on Windows 11
- First, click on this link to download the batch file to start Hyper-V on Windows 11. Folks at the Microsoft Virtualization team have created the batch file.

- Next, choose Run as administrator by right-clicking on the batch file.

- After that, a PowerShell or Command prompt windows open and begin installing Hyper-V on your windows. To enable this feature, you should be connected to the internet.

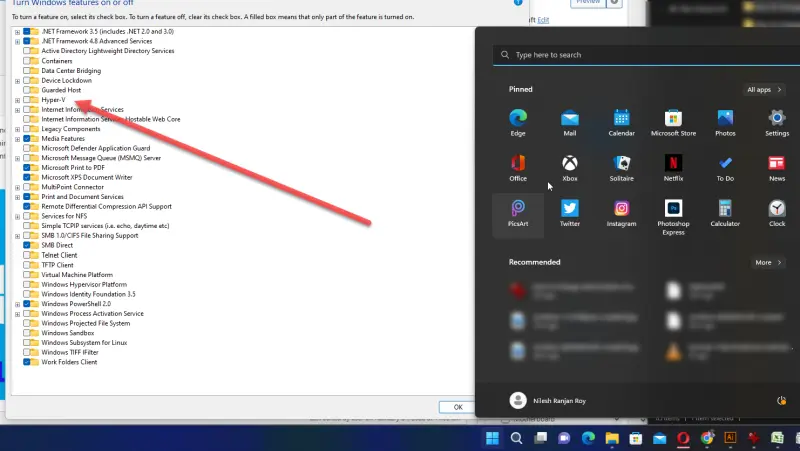
- Next, restart your PC and press Windows key + R. Type optionalfeatures.exe and tap Enter key.

- A window opens up, then scroll down and mark all the checkboxes under Hyper-V.

- Click on OK. After that, all necessary packages will start installing, then ask you to restart your PC.
- Lastly, Hyper-V will enable on your PC. Go to Search menu, type Hyper-V, and hit Enter key to open it.

- If Hyper-V does not appear in the search results, you can open the Run window by pressing Windows key + R. Type virtmgmt.msc and tap Enter key.

- It will open Hyper-V Manager on your Windows 11 PC directly.

Enable Hyper-V on Windows 11 and Create Virtual Machines
This is how to install Hyper-V and turn it on on Windows 11. This batch file is still working on Windows 11. It’s worth downloading and installing on your computer. Hyper-V allows you to create a virtual machine in Windows 11 that can run Ubuntu, Windows 11X, or any other OS from your computer. That’s all we have to say. Comment below if you have any questions.
More from Digital Dopes:
