


Sometimes you may get into troubles that are not easy to solve. It is where Safe Mode comes in handy. It allows you to boot into Windows without loading all the drivers and apps. This can identify the root cause of problems or adjust if your laptop is not working in normal mode. This guide will show you how to enter Safe Mode in Windows 11.


Also Read:
- How to Install Windows 11 on Asus Laptop from a USB Flash Drive
- Asus Laptop Boot from USB Flash Drive
- How to Access Asus Boot Menu with Asus Boot Menu Key
How to Start Windows 11 Into Safe Mode
There are many ways to boot your laptop into Safe mode and every method is useful in certain situations.
Using Bootable USB Drive
If your laptop stops working and does not boot up, you can use this method. Click here to create a Windows 11 bootable USB flash drive if you don’t have Bootable media.
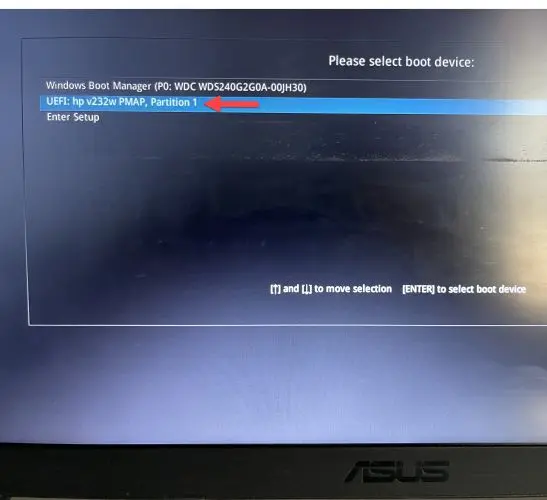
- First of all, connect the bootable USB flash drive.
- Next, turn on your laptop and press the Esc key several times to launch the boot menu.
- Now, pick your USB drive and tap Enter key.
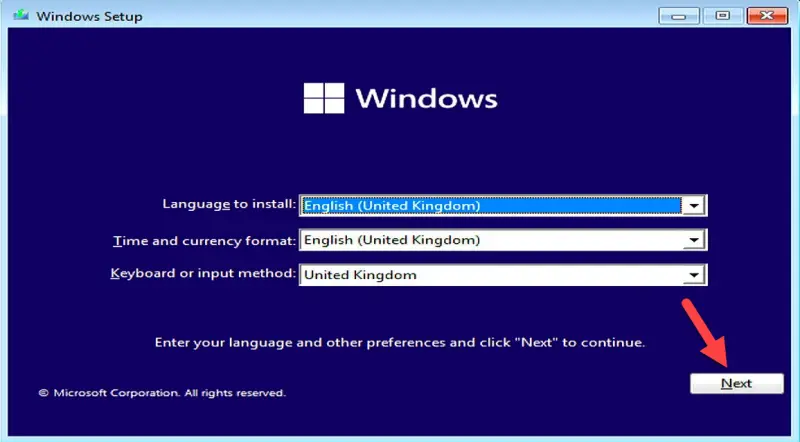
- Click Next in the Windows Setup wizard.
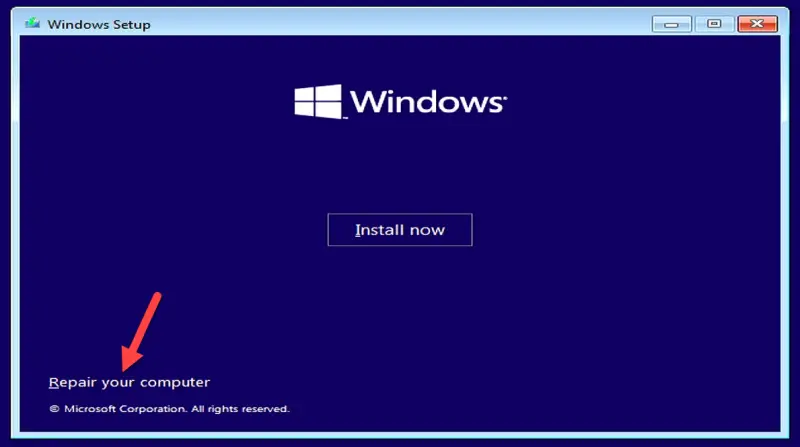
- After that, tap on Repair your computer link.
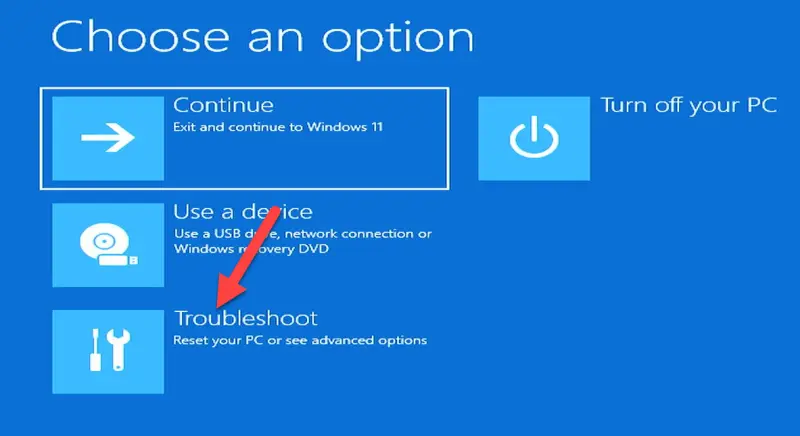
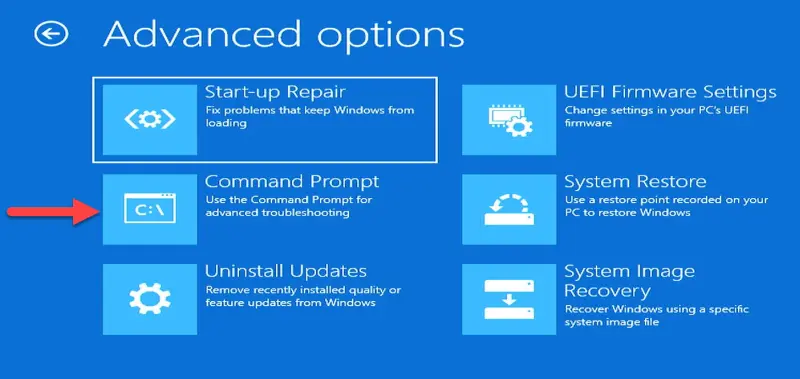
- You will get Choose an option screen, select Troubleshoot.
- Next, choose Command Prompt.
- Paste or type the given command carefully and hit Enter.
bcdedit /set {default} safeboot minimal
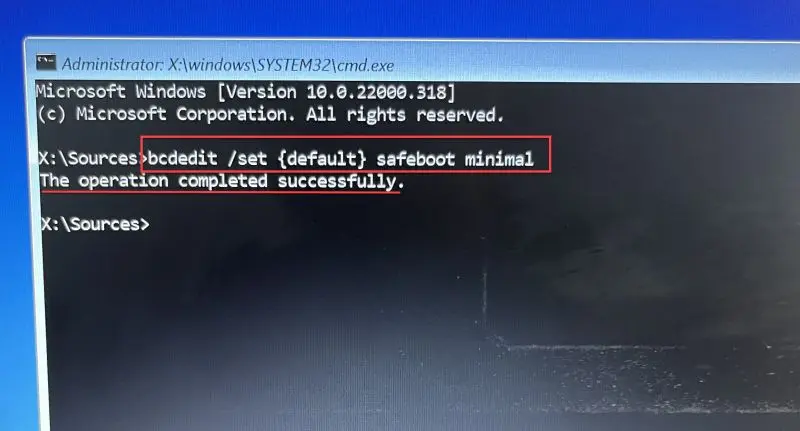
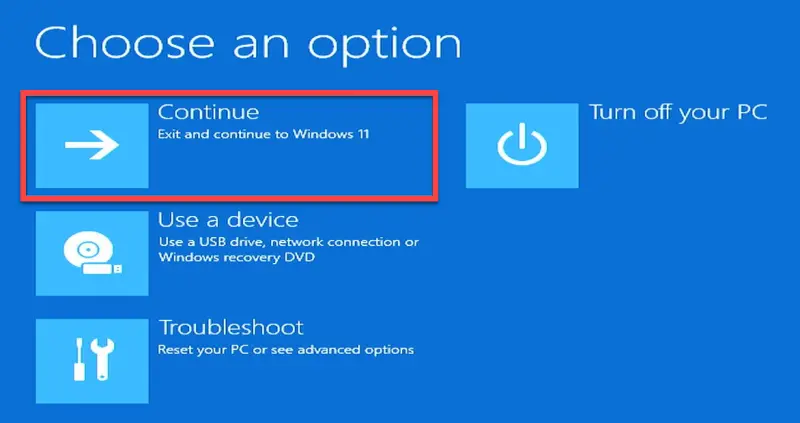
- Close the prompt and tap Continue to restart your laptop to boot into safe mode.


Using Shift + Restart
- First, press the Windows key on your keyboard.

- Next, keep pressed the Shift key, click on the Power button and hit Restart.
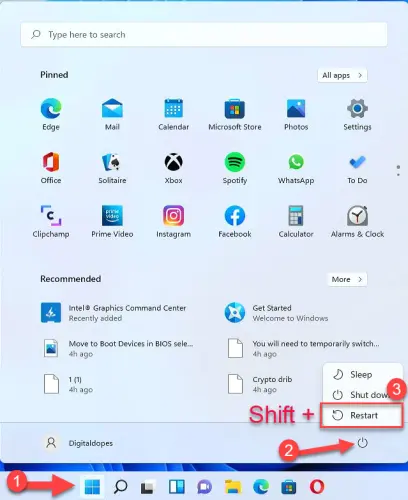

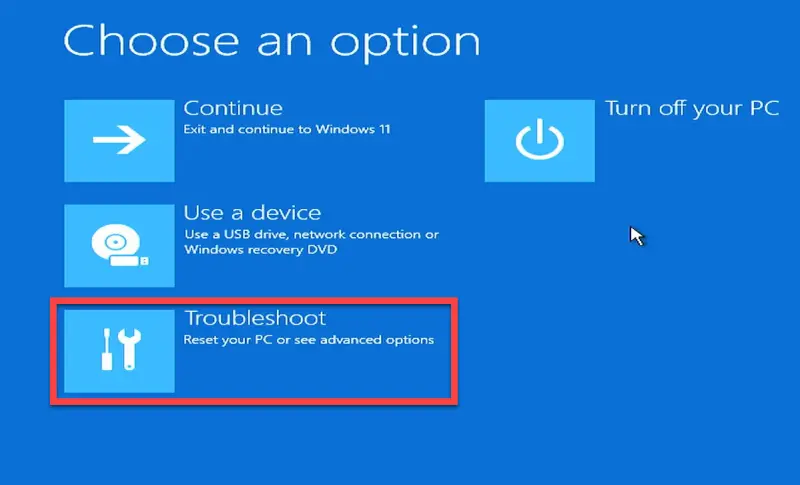
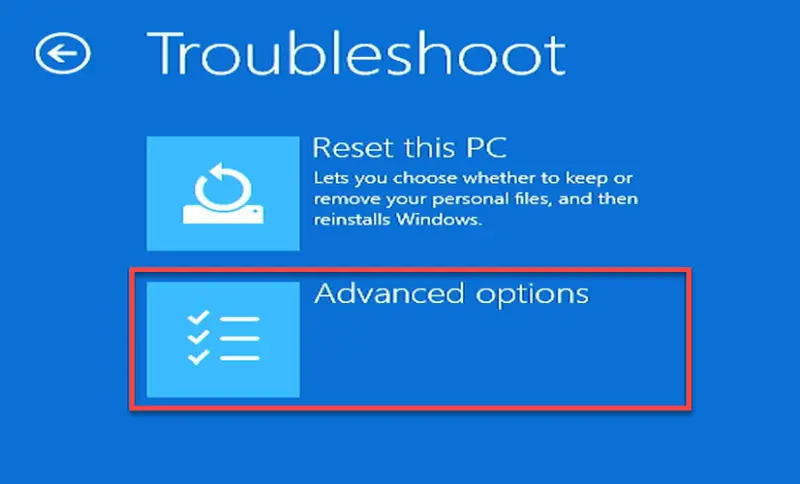
- Your laptop will restart and load “Choose an option” wizard. Click on Troubleshoot.
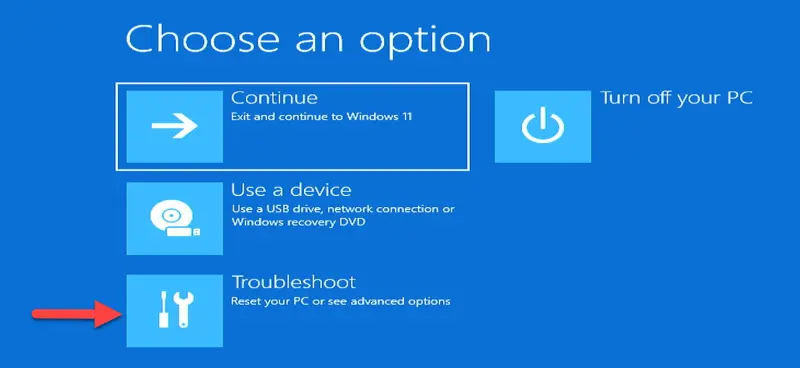
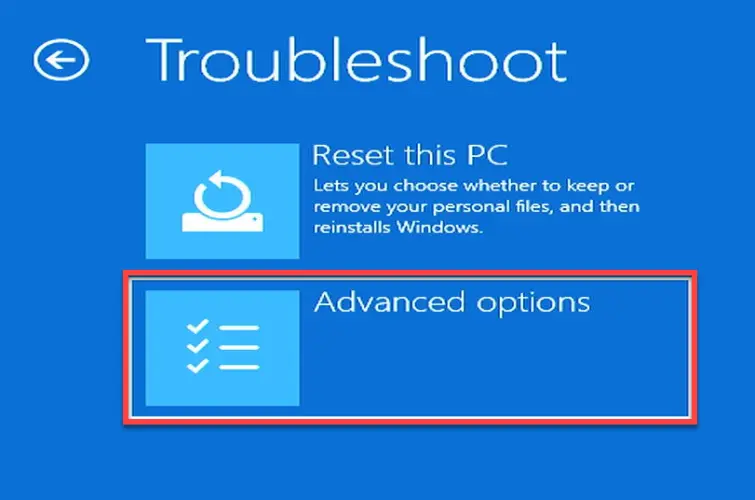
- Now, go to the Advanced option.
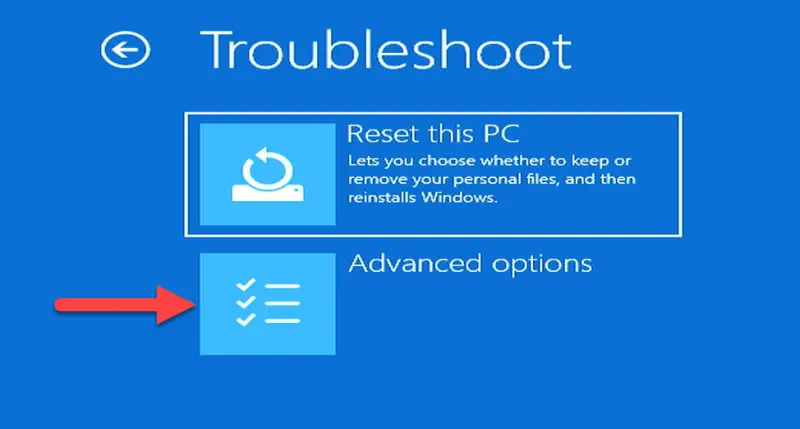
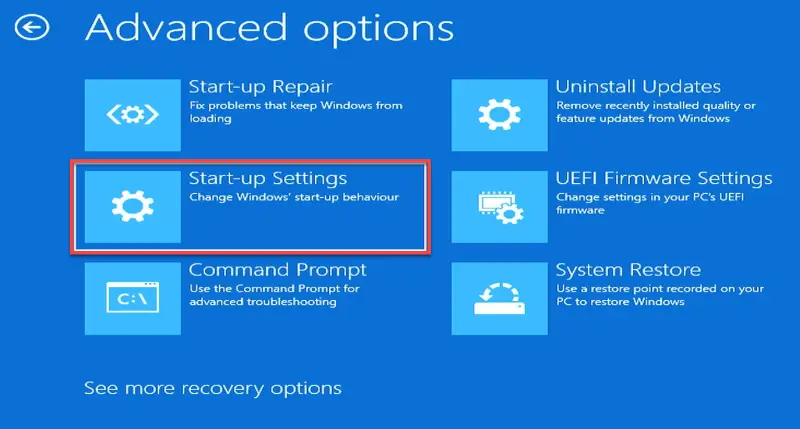
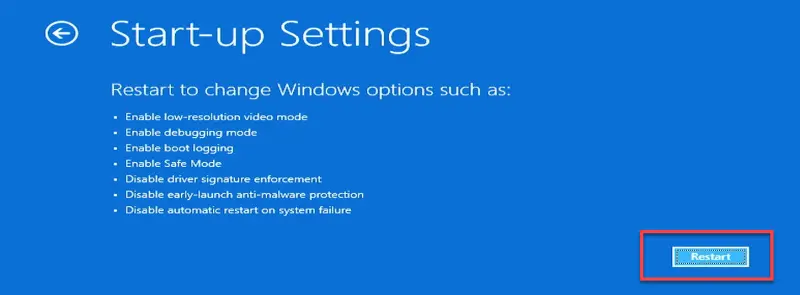
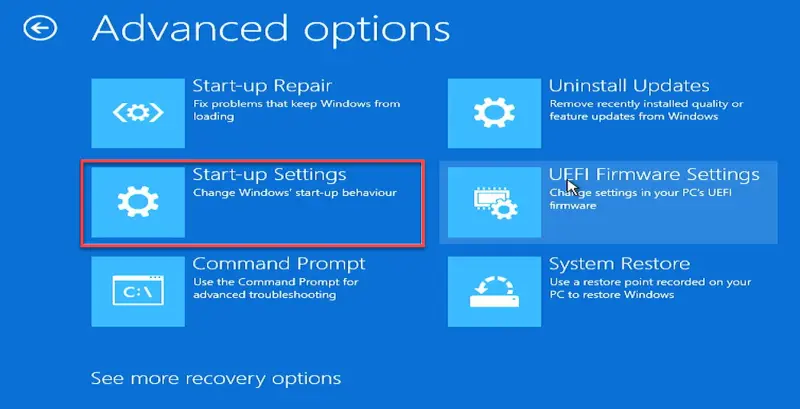
- Then, click on Startup Settings.
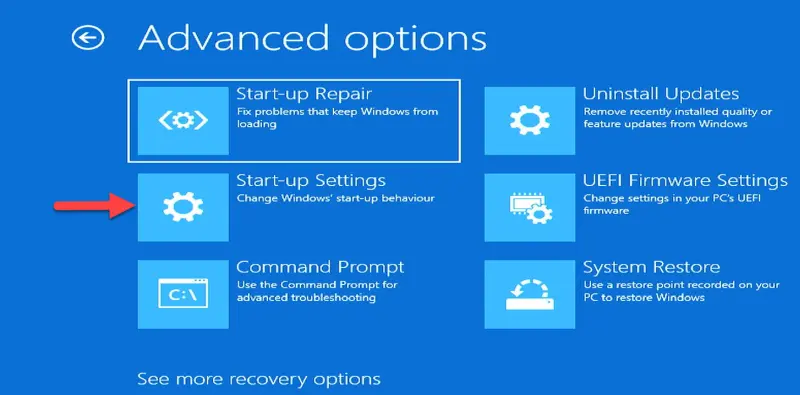
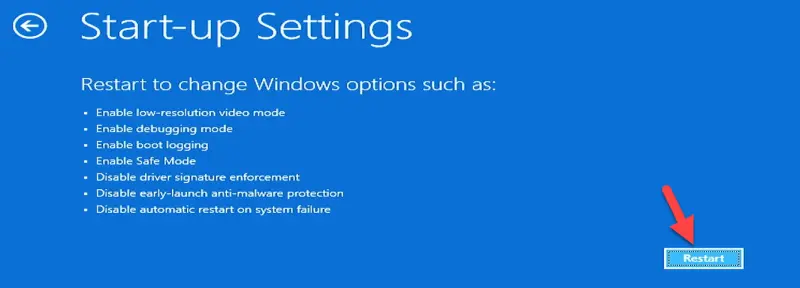
- Finally, hit Enter to Restart your laptop.
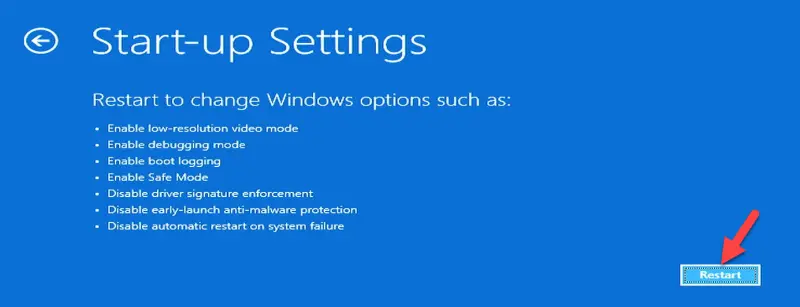
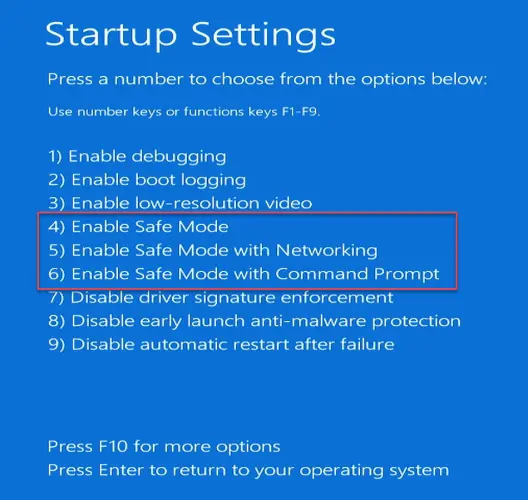
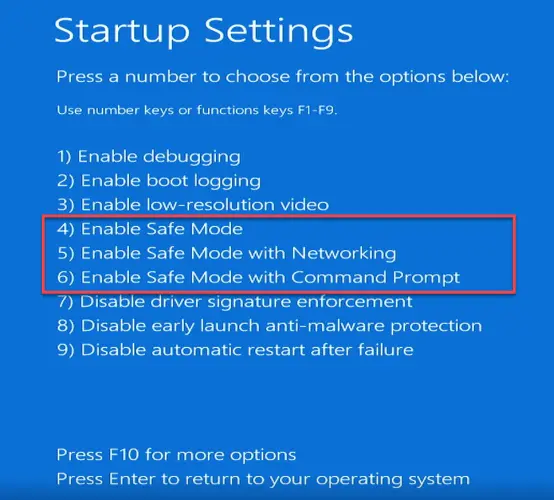
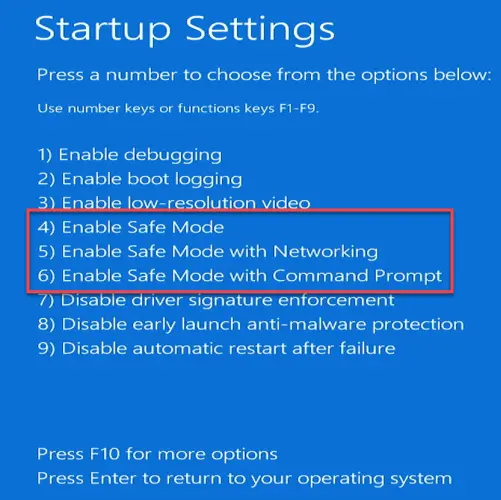
- Choose any one option to boot into safe mode. Press 4 to start basic safe mode, 5 to boot Safe Mode with Networking, and 6 to boot Safe Mode with Command Prompt.


Using System Settings
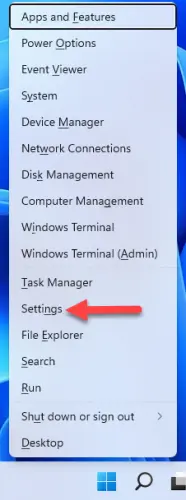
- Press Windows key + X and select Settings.
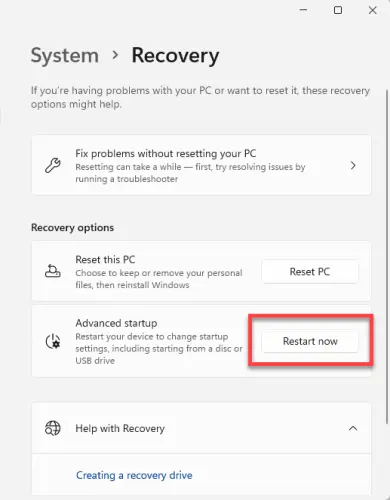
- Now, tap the Recovery option.

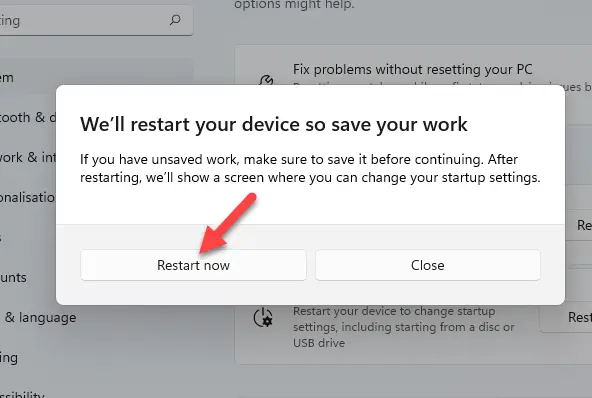
- After that, hit the Restart now next to the Advanced startup option.
- Next, click on Restart now to confirm.
- Now, go to Troubleshoot and then Advanced option.
- Click on Startup settings and then hit Enter to Restart.
- Press F4 to start basic safe mode, F5 to boot Safe Mode with Networking, and F6 to boot Safe Mode with Command Prompt.


Using Automatic Repair Mode
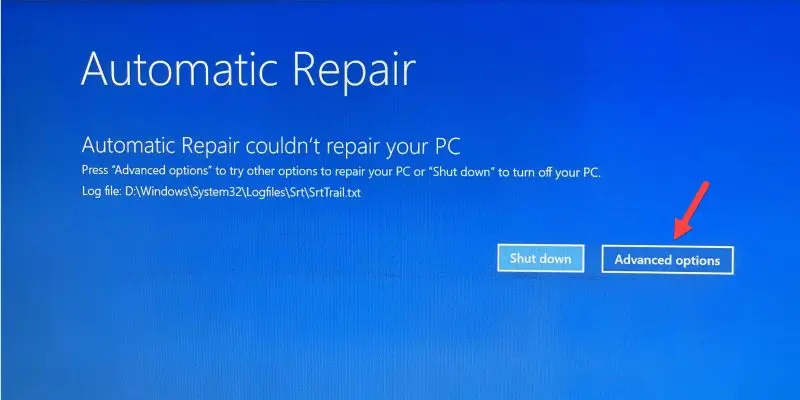
Windows 11 comes with a failsafe switch built in that activates when Windows fails to start normally. After three failed attempts, Windows 11 loads its Automatic Repair mode when booting for the fourth time. You need to interrupt Windows 11’s normal startup process three times consecutively.
- Start your laptop, wait till you see the manufacturer’s logo, press the Power button, and hold it for 4 seconds to shut down your laptop forcefully. Repeat it 3 times and let your laptop boot for the 4th time to open Automatic Repair mode.

- Next, click on Advanced options.
- Then, pick Troubleshoot under Choose an option screen.
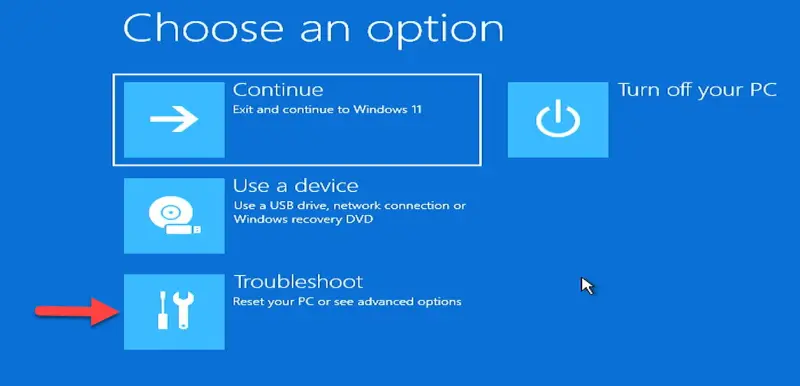
- After that, go to Advanced options.
- Now, pick the Startup settings.
- Lastly, click on the Restart button.
- You will get three safe mode options, choose as per your desire. Press F4 to start basic safe mode, F5 to boot Safe Mode with Networking, and F6 to boot Safe Mode with Command Prompt.


Final Word
These are the methods we know to start Windows 11 in Safe Mode. There are many options, so you can choose which one you like depending on your laptop’s state. You can try some of these methods and let us know which one you prefer most. Please comment if you have any other ways to access Windows 11’s Safe Mode.


")
