


You can use Windows 11 bootable USB flash drive to clean install Windows 11 on your Asus laptop. There are various way to install Windows 11, but the easiest way is to use a USB instead of a DVD.
This is a step-by-step guide to learn How to install Windows 11 on Asus Laptop from a USB Flash Drive.
The whole procedure consists of four parts:
- Make a Bootable Windows 11 USB Flash Drive.
- Boot your laptop from a USB Flash Drive.
- Install Windows 11 from USB Flash Drive.
- Finalize Windows 11 configuration setup on your laptop.
Before doing anything, let’s ensure that we have all the required stuff to create Windows 11 bootable USB.
- A USB flash drive(empty) of at least 8GB.
- A working laptop or computer with internet.
Windows 11 Requirements
You Laptop must meet these requirements to install Windows 11.
- Processor:- 1 GHz or faster with 2 or more cores (64-bit).
- RAM:- 4 GB or more.
- Storage:- 64 GB or larger.
- System firmware:- UEFI, Secure Boot capable.
- TPM:- 2.0
- Graphics card:- Compatible with DirectX 12 or later with WDDM 2.0.
- Display:- 720p display.
- Internet:- Windows 11 setup might ask for an internet connection and a Microsoft account.
If your laptop or computer doesn’t support these requirements, then you can try our step-by-step guide to learn How to Bypass Windows 11 Installation Requirements.
The instructions below will help you to create Windows 11 Bootable USB flash drive and install a new copy of Windows 11 from USB Flash Drive on an Asus Laptop.
First, you have to prepare a Windows 11 bootable USB to install Windows 11 on your ASUS laptop.
Make Windows 11 Bootable USB Flash Drive
The Media Creation Tool is the most preferred way to make a bootable USB drive. Everyone needs to have a bootable USB flash drive, if your computer faces a severe problem or you wish to clean install your laptop or computer, then Windows 11 installation media will do the task for you.
There are also other ways to create Windows 11 bootable USB flash drive. If you want to know, then follow our guide on How to create a Windows 11 Bootable USB Drive.
Follow the instruction to make a Windows 11 bootable USB flash drive:
- Plug in an empty USB flash drive to your Laptop or computer.
- Next, visit the Microsoft official page.
- Click Download Now under Create Windows 11 Installation Media and Save the file.

- After that, double-click on the MediaCreationToolW11.exe file to open.

- Click on Accept at the bottom right corner of the license terms page.

- It will suggest the Language and Edition for you. If you want to change, then uncheck “Use the recommended options for this PC.” Press Next to continue.

- Select USB flash drive and tap Next to continue.

- Ensure that your USB flash drive is listed and hit Next to continue. If not, click on Refresh drive list to choose another USB flash drive.

- It will start to create a Windows 11 bootable USB flash drive. Wait till it finishes.

- Lastly, click on Finish.


Now, your bootable USB flash drive is ready to use.
How to Boot ASUS Laptop from a USB Drive
There are two ways to boot your Asus laptop from a USB flash drive:
- Boot Menu: It is the simplest and easiest way.
- BIOS Boot Order: You have to change the boot order.
How to Boot from a USB Flash Drive using Boot Menu
Follow the instruction to boot your Asus laptop from USB:
- First, plug in the Windows 11 bootable USB flash drive on your Asus laptop.
- Start your laptop.
- When the first screen appears, press the Esc key to enter the boot menu. It varies from manufacturer to manufacturer. Don’t hesitate to contact the ASUS repair Centre if you require any.
- Now, select your USB flash drive and press Enter key.

After that, your Asus laptop will boot from a USB flash drive.
How to Boot from a USB Flash Drive using BIOS Boot Order/Boot Priority
Follow the steps to change the boot order:
- Start your Asus laptop by inserting Windows 11 bootable USB flash drive.
- Press F2 to open the BIOS setup when you get the first screen.
- Now, look for Boot order and move the USB flash drive to the first position.

- Lastly, save and exit from BIOS.

Your Asus laptop will boot from a USB flash drive whenever you boot your laptop.
Install Windows 11 on Asus Laptop from a USB Flash Drive
Personal files and apps will be deleted from your laptop, so take a backup of all your files before installing.
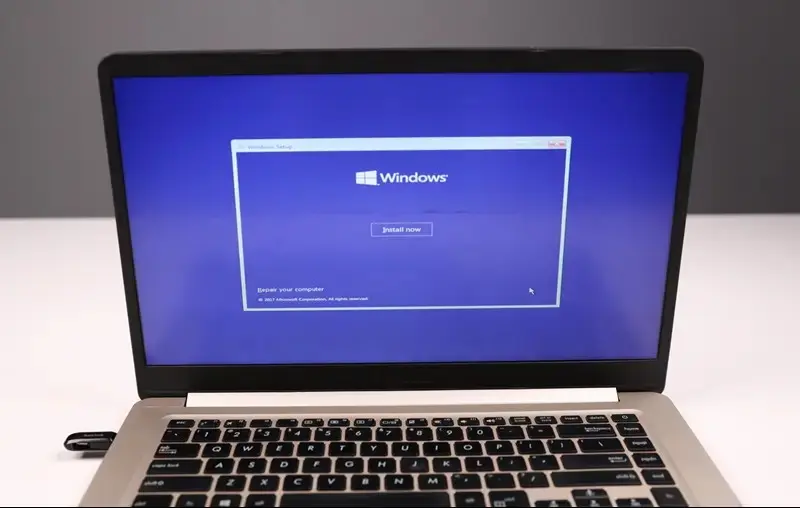
After booting your Asus laptop from Windows 11 bootable USB flash drive. Windows 11 Setup screen will open.
- Choose the language, time, and input method from the drop-down menu and hit Next to continue.

- Click on the Install now button.

- After that, enter the Product key and hit Next. If you don’t have, then click on I don’t have a product key.

- Next, select the operating system as per your wish. If you have entered the product key of Windows 10 home, then you have to choose Windows 11 home to activate the key. You can select any version if you don’t have the product key.

- Tick mark the check box I accept the Microsoft Software License Terms and click Next.

- Select Custom: Install Windows only (advanced) to install a fresh copy of Windows 11.

- Select the partition drive where you wish to install Windows 11 and tap Next to continue. You can also format the drive to remove the old OS file.

- It will instantly start the process of installing Windows 11. Your laptop will reboot after finishing the installation process.


Your Asus laptop may be stuck in a boot loop if you’ve chosen BIOS Boot Order to Boot from USB. Removing the USB Flash Drive can fix this problem.
How to Configure Windows 11 on Asus Laptop
After installing Windows 11, you will get Windows 11 Out-of-Box Experience setup to finish.
Follow the instruction and steps to complete the setup:
- Choose your Country or region and click Yes.

- Select your Keyboard layout or input method and hit Yes.

- Next, You can add a second keyboard layout or skip this step.

- After that, connect to your internet or skip it by clicking on I don’t have internet.

- Now, enter a name for your laptop and hit Next. Hit skip for now to skip this step.

- Insert a Username for your Asus laptop and tap Next.

- Now, set a password for your Asus laptop, confirm your password, and click Next.


- Set three security questions and answers. It will help you to reset your password if you forget your password.

- Select your privacy settings. Scroll to the bottom and click Accept.

- It takes a few minutes to save all settings.

- After that, you will get your desktop screen to use.


