


Display drivers and other power settings can often cause brightness problems on your computer.
Suppose Windows doesn’t let you adjust brightness on your PC or laptop. In that case, restart your computer or updating Windows to the latest version.
After updating the latest Windows, install the latest drivers that could be pending on the updates tray. Other solutions are listed below.

Remember that each model of laptop and every operating System are unique, so make sure to check the settings for each one.
If the brightness isn’t working, these solutions can be applied to any laptop model, including HP and Dell.
How to fix Windows 11 brightness slider not working
Update the display adapter drivers from Device Manager
- Right-click on the Start menu and go to Device Manager.

- Double-click to expand Display Adapters.
- Right-click on Intel(R) HD Graphics.
- Select the option Update Driver.

- Reboot your System after its update.


You can also update or download the latest drivers from the manufacturer’s website.
The missing drivers could cause your laptop to have a brightness adjustment problem. We recommend downloading a third-party driver updater if this fails.
It will help you to know which drivers need to be updated. The tool will allow you to update multiple drivers simultaneously if necessary, or just one. Click on the update button beside each driver.
It will install and download all the drivers for you. You can avoid permanent damage to your computer by installing the correct driver versions.
Using Driver using third party app
We strongly recommend using a driver update assistant to ensure that everything runs smoothly and prevent GPU driver issues. It is very simple to use and will resolve all your issues in just a few clicks. Follow the steps:
Note:- It is a paid software.
- Download and install DriverFix.


- Open the software.
- Wait for DriverFix to Scan all driver issues.

- The application will show all the issues of your driver.
- Click on Update All Drivers Now to update and fix the issue.

- Wait for the driver to downloads and install automatically on your computer.
- Reboot your System for the change.


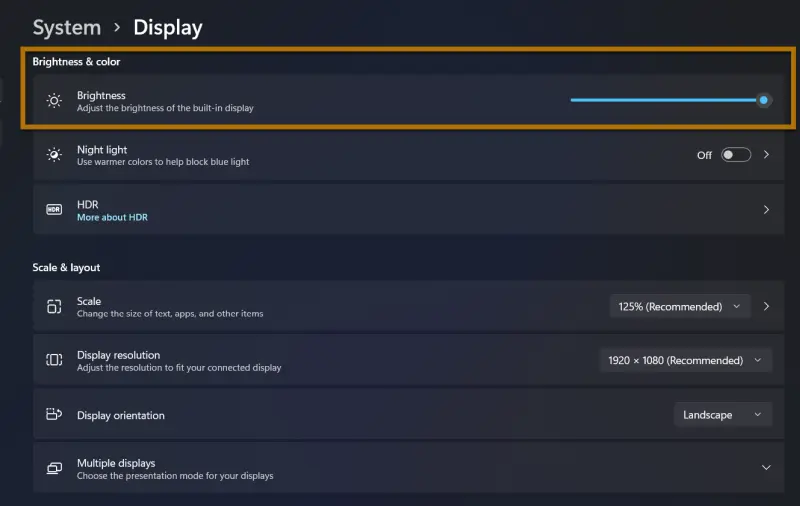
Enable adaptive brightness in Windows 11
- Click on the Start button and go to Settings.

- Click on Display in the System section.

- Tick the checkbox Help improve battery by optimizing the content shown and brightness.
- Turn On Night light.

The Windows operating system’s adaptive brightness feature uses an ambient light sensor. It adjusts a display’s brightness according to its surroundings.


Enable the PnP Monitor driver
- Right-click on the Start menu and go to Device Manager, as shown above.
- Double-click on Monitors.
- Right-click on the Generic PnP monitor to see it is enabled or disabled.

- If Enable, then Disable it or vice versa.
- Click on “yes” for confirmation.
- In the Action tab and click on Scan for hardware changes.

- It scans and show which hardware settings are changed.
- Plug-and-play refers to hardware devices that work without the need for a driver. It is a generic driver for the Display that will automatically get installed by Windows.


Update the registry
- Click on Search and type Regedit and hit Enter key.
- Click on “Yes” to confirm.

- Go to HKEY_LOCAL MACHINE.
- Click on System and go to ControlSet001.
- Click on Control, then go class (file name 0000) or press Ctrl + F and type FeatureTestControl.


- Double click on it and add data value to 0000ffff.
- Click on “Ok.”

Note:- class name {4d36e968-e325-11ce-bfc1-08002be10318}/000 - Try update the registry if you still face trouble setting brightness on your laptop. Make Back up of the registry before you make any changes, then restore it if any problem occurs.


This solution includes steps that modify the registry. Follow these instruction correctly, Otherwise serious problems may occur.
More from Digital Dopes:


")
